Starvmount MINI POE Receiver Installation Instructions
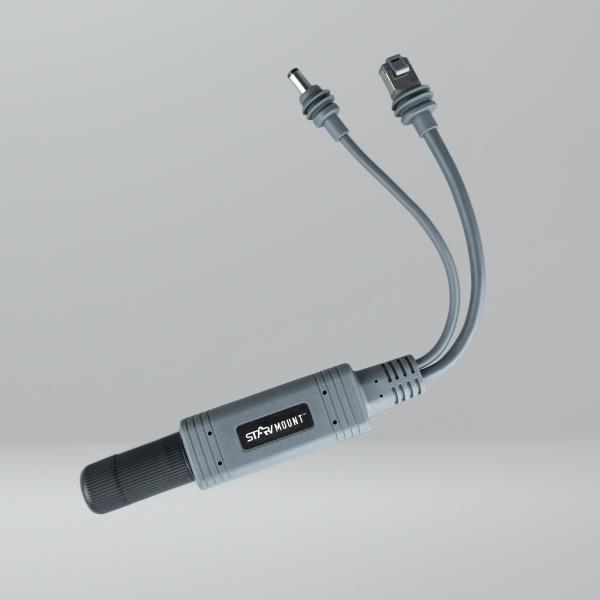
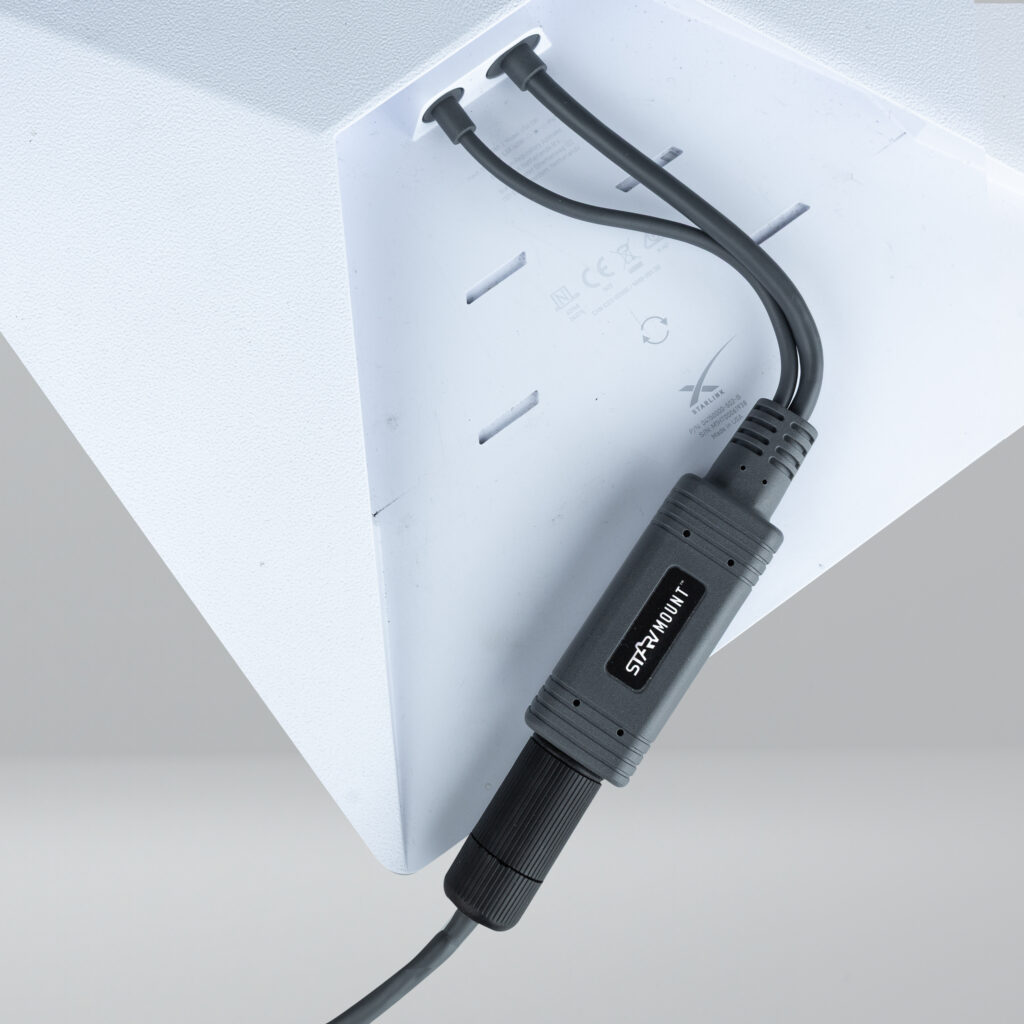
The MINI POE Receiver features two fixed cables: one Ethernet cable and one DC barrel connector. Both cables include Starlink weather seals and are designed to connect directly to the two ports on the Starlink MINI, providing power via the DC barrel connector and network connectivity via Ethernet.
These two connections are combined within the POE Receiver to deliver Power over Ethernet. The POE Receiver then connects via an Ethernet cable to a POE injector and, in turn, to an external WiFi access point or network router.
In addition to the fixed cables, there is a dedicated Ethernet port for connecting the POE Receiver to the POE injector. This port is sealed using a weatherproof seal designed to protect the Ethernet cable entry into the POE Receiver and prevent water ingress.
Ethernet Cable Requirements
The plastic weatherproof seal body with bayonet fitting only supports Ethernet cables with minimal or no strain relief. An example is pictured here.
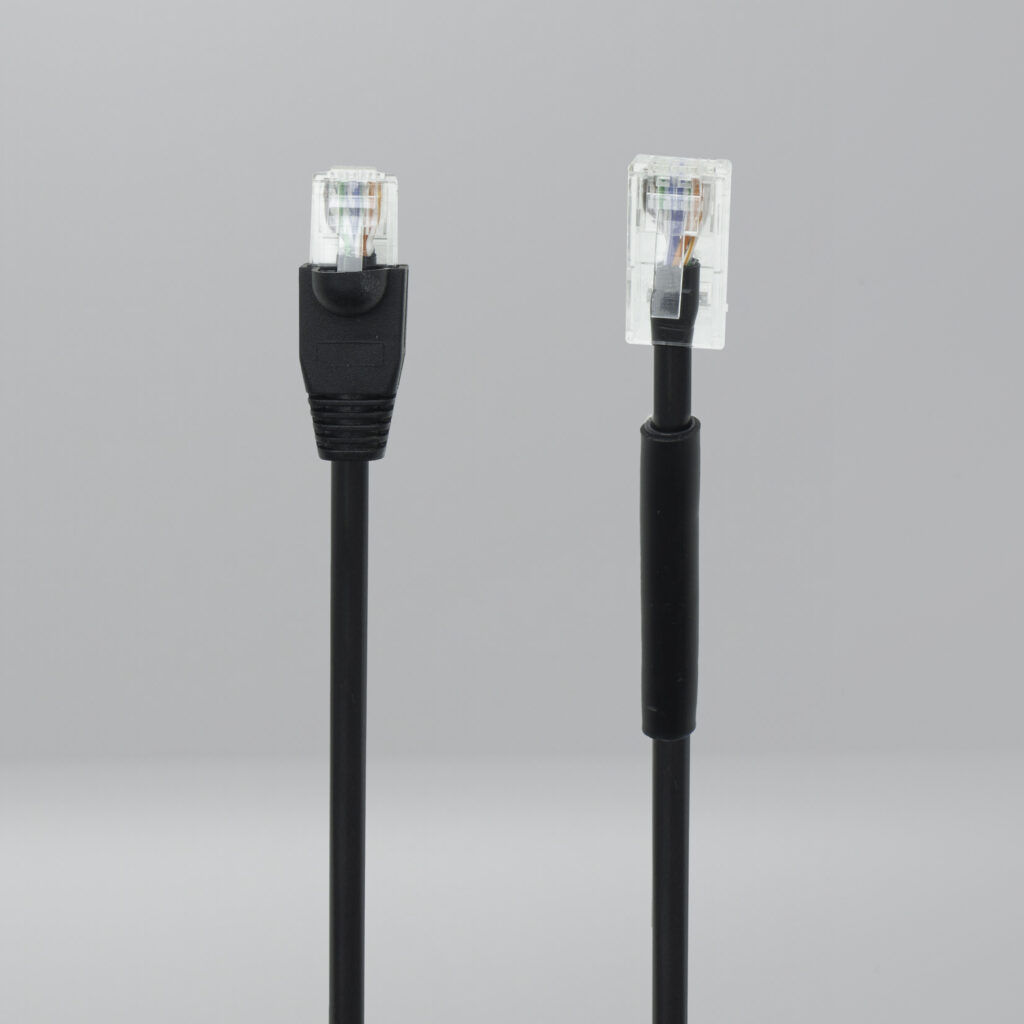
The cable end on the right has no boot or strain relief, allowing the RJ45 connector to pass through the seal body correctly and seat fully within the bayonet fitting. This thinner cable also features a collar which ensures the cable is correctly sized, enabling the rubber cable grommet to compress evenly and create an effective seal. Our newer thicker gauge CAT6A cables do not have this collar as they are more than thick enough to create a good seal.
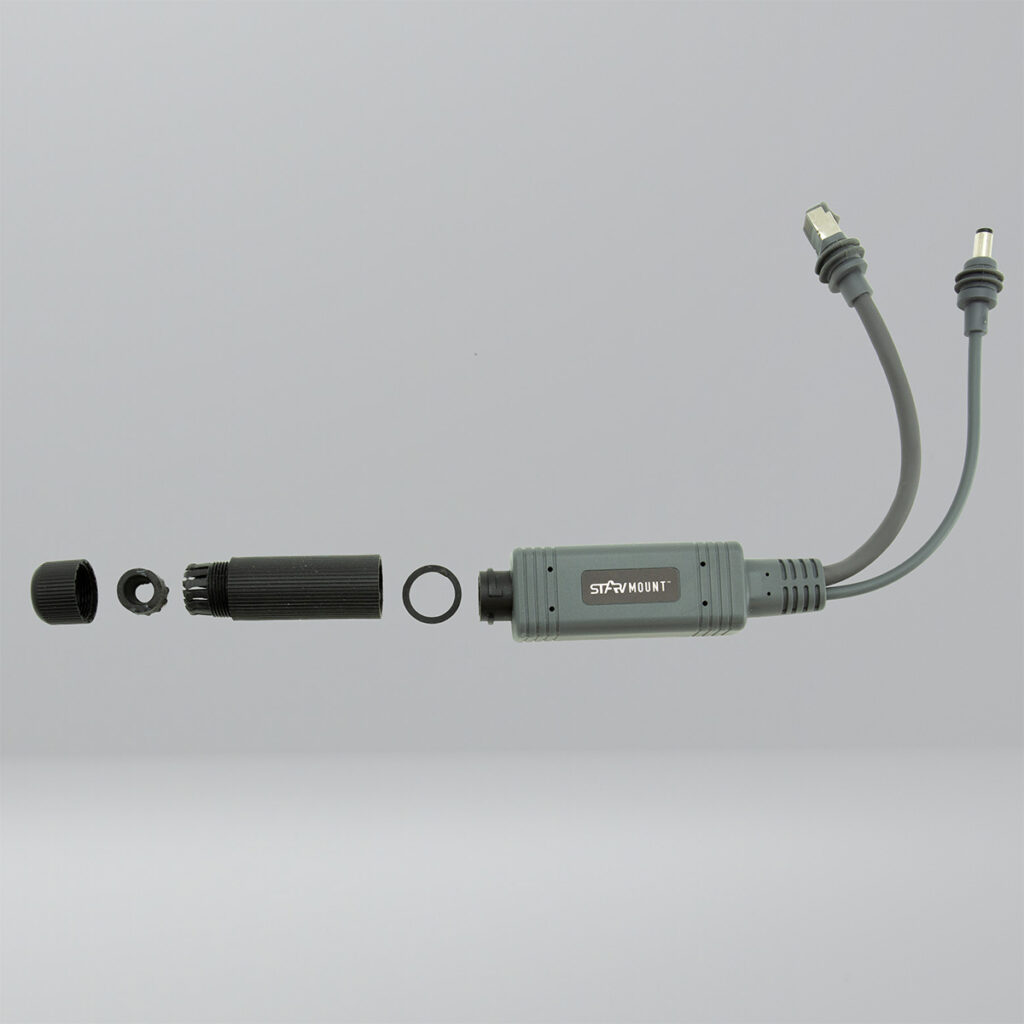
POE Receiver Weatherproof Seal Components
The weatherproof seal consists of four components. Working away from the POE Receiver, these are:
- Rubber o-ring
- Plastic weatherproof seal body with bayonet fitting
- Rubber cable grommet
- Plastic threaded compression fitting
Silicone Grease Tube
Along with the POE Receiver and the four-part weatherproof seal, a 5 g tube of silicone grease is supplied. This grease is intended to be used alongside the weatherproof seal to aid assembly and ensure resistance to water ingress.
The silicone grease should be retained and reapplied whenever the weatherproof seal is opened and resealed.
Assembling the Cable Seal
Fitting the Cable and Assembling the Seal
- Take the plastic threaded compression fitting and thread it onto the Ethernet cable that will connect to the POE Receiver Ethernet port. Ensure the wider threaded opening faces towards the RJ45 plug that will connect to the POE Receiver.
- Open the silicone grease tube.
- Apply a small amount of silicone grease to the rubber o-ring.
- Fit the rubber o-ring around the black cylindrical plug on the POE Receiver. Ensure it sits flat, is not twisted and is positioned at the base of the black cylindrical section, flush against the grey body of the POE Receiver.
- Apply a small amount of silicone grease to the bayonet end of the plastic weatherproof seal body, wiping it evenly around the inside of the bayonet fitting.
- Insert the cable into the plastic weatherproof seal body. Pay close attention to the internal shape of the seal body and align the RJ45 connector so the spring release clip matches the stepped internal profile.
- Plug the RJ45 connector into the POE Receiver socket.
- Slide the seal body onto the black cylindrical plug and carefully rotate until the bayonet engages and compresses onto the rubber o-ring.
- Check that the rubber o-ring is evenly compressed with no twists or gaps. If required, disengage and repeat the previous step until the rubber o-ring seating is visually correct.
- Apply a small amount of silicone grease to the hole in the rubber cable grommet. Also apply grease to the split in the grommet to aid fitting over the cable.
- Fit the grommet to the cable with the flat face pointing outwards, away from the POE Receiver, and the inverted cone facing inwards towards the weatherproof seal body.
- Carefully work the grommet down the cable and into the barbed section of the plastic weatherproof seal body until the flat face and outer rib sit fully within the barbed area.
- Apply a small amount of silicone grease to the fine threaded section of the plastic weatherproof seal body.
- Take the plastic threaded compression fitting previously placed on the cable in step 1 and screw it onto the plastic weatherproof seal body.
- Inspect the rubber cable grommet to confirm even compression, checking for gaps around the cable and along the split.
Sealing Notes
It is critical that these steps are followed to ensure the seal is fully watertight. It is advisable to assemble the seal dry initially to become familiar with the fitting process, then complete final installation using the silicone grease.
For most installations, silicone grease provides suitable protection against moisture ingress. In environments subject to extreme temperature fluctuations, it is advisable to replace the silicone grease with a sealant adhesive such as Sikaflex 522 or EBT. The fitting process remains the same, with the sealant replacing the silicone grease.
Mounting Guidance
When mounting the POE Receiver, it is advised to include a drip loop before the POE Receiver. This can be achieved by forming a small loop in the cable and securing it with a cable tie immediately before the POE Receiver. With the loop positioned as described, moisture running down the cable will be diverted around the loop and drip off at the lowest point.
When mounting the POE Receiver itself, attach it to the flat body of the smaller section of the Starvmount MINI mount using long cable ties or a similar suitable fixing method. The POE Receiver should be elevated and not resting flat against the roof. This allows moisture to naturally run away from the unit and enables it to dry in open air following exposure to moisture.
Connection to Starlink MINI
Insert the POE Receiver DC barrel connector into the Starlink MINI power socket. Insert the POE Receiver Ethernet plug into the Starlink MINI Ethernet port, removing the Ethernet bung prior to connection.
You are now ready to connect the Starlink MINI to the POE injector using the fitted Ethernet cable.